Managing the customer account access link
You can change the text displayed with the customer account access link, or translate it to a different language. This guide outlines how to customize the account access link text.
This guide applies to stores on the Shopify Checkout Integration.
Determine the origin of the account access link
First, you need to determine whether Recharge injects the account access link via a Shopify asset or with JavaScript:
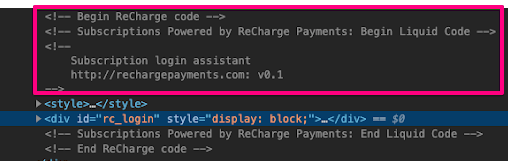
Injected as an Asset
Open your browser's inspect element tool and search for the comment and search for the code snippet <!-- Subscription login assistant http://rechargepayments.com: v0.1 -->. If present, the account access link was added as an asset.
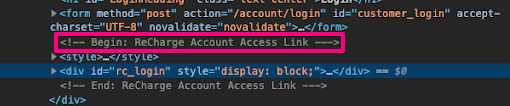
Injected with JavaScript
Open your browser's inspect element tool and search for the comment <!-- Begin: Recharge Account Access Link ---> . If the comment is present, the account asset link was added to your theme with JavaScript.
Customize link added as an asset
To customize a link that has been added as an asset:
- Navigate to your stores Shopify theme files
- Access the
subscription-account-login.liquidfile from the list of Snippets. - Update the text in between the
<h5>brackets to change the default “Manage subscriptions” wording. - Update the text in between the
<a> hrefattribute to change the link wording.
Add additional translation
You can add additional translations to your Shopify theme to translate the account access link depending on the customer’s language preferences.
Add the following key in each locale JSON file in your Shopify theme code.
 "rc_login_helper": {
      "title": "Manage subscriptions ",
      "link": "Click here"
  }
You must translate the key and update each locale file depending on the number of translations you have on your store.
Customize link added with JavaScript
Add translation
The following code demonstrates creating a translation object that will change the value of the locale parameter on the Shopify frontend object.

The titleText property labels the instructions for your customer, and the linkText property represents the link customers interact with.
window.rcLoginAccessLink = {
    translation: {
        bg: {
            titleText: "Нуждаете се от помощ за достъп до абонаментите си?",
            linkText: "Натисни тук",
        },
        cs: {
            titleText: "Potřebujete pomoc s přístupem k vašim předplatným?",
            linkText: "Klikněte zde",
        },
        en: {
            titleText: "Alternative title text",
            linkText: "Alternative link text",
        },
    },
};
Note:
If the
Shopifyobject andlocaleproperty are not present on the storefront, you can pass an alternative translation as the default strings.
Disable translation
The following code demonstrates setting the disableTranslation parameter to true on the rcLoginAccessLink to disable the translation. You can use the following code if you have an integration that handles your translations. When the disableTranslation parameter is set to true, you can keep the default strings for all the locales.
window.rcLoginAccessLink = {
    disableTranslation: true,
};
If omitted, the default value is set to false.
Bypass account access link inject
You can prevent the account access link from appearing on the login page all together:
- Find the
theme.jsfile in your Shopify theme - Add the following code to prevent the account access link from appearing on the login page
window.rcLoginAccessLink = {
    disableInjection: true,
};
If omitted, the default value is set to false.
Override default injections
You can change where the account access link will appear. This involves updating the default injection options for the account access link. Doing this lets you change where the link will appear. You can also override the default injection options by passing in values for page, injectionAnchorSelectors and injectionPosition.
The following code sample shows the default values:
- Page: Indicates which page the account access link should appear on.
- injectionAnchorSelectors: A list of CSS selectors used to select the anchor element for JavaScript Injection.
- injectionPosition: The injection position relative to the injection anchor. This is determined by injectionAnchorSelectors.
{
    injectionAnchorSelectors: [
        "form[action*='/account/login']",
        "form.login-form",
        "form[id='sign in']",
    ],
    page: "/account/login",
    injectionPosition: "afterend",
},
Refer to Mozilla’s Developer Documentation for more information on the visualization of position names.
Note:
Settings keys can be omitted entirely, causing the default settings to apply. If you want to pass in a custom settings object, ensure that you provide value for all three keys,
page,injectionAnchorSelectors, andinjectionPosition.
Adding account access link in multiple places
If you want to show the account access link in various places throughout a store, you can enable Recharge to inject it into a theme in multiple places.
Setting up login modal
If you're using a login modal, you'll need to configure the account access link's settings so it can appear on all pages. The following code sample demonstrates making the account access link available on all pages and selecting a popover modal where it will render.
- Identify the desired destination for the account access link.
- Sets the
injectionAnchorSelectorsproperty as the target CSS element where the link will render. The propertyinjectionPositionrefers to the element's position in the DOM. View Mozilla's documentation to learn more.
window.rcLoginAccessLink = {
    settings: [
        {
            page: '/',
            injectionAnchorSelectors: ["form[action*='/account/login']"],
            injectionPosition: 'afterend'
        }
    ]
};
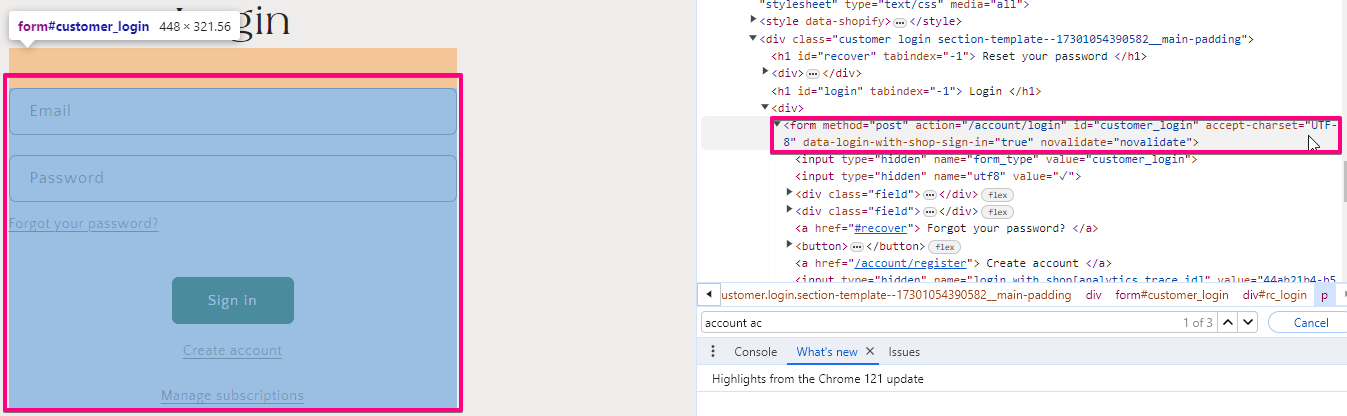
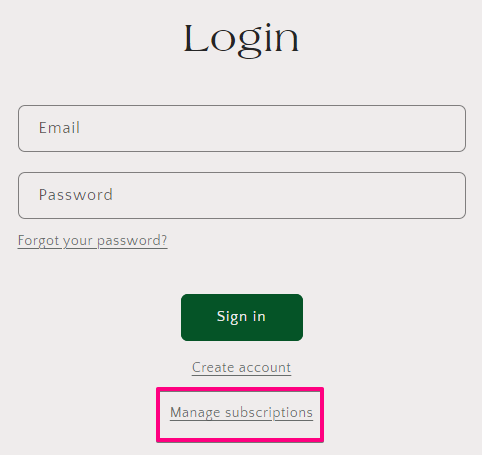
- Update CSS styling. You'll need to add CSS that targets the link to match your storefront branding. When you initially inject the account access link, it may not match the store's styling as demonstrated in the following image. Once updated, the Account Access link should match your store branding.
The following CSS demonstrates changing the account access link's color scheme and spacing. For detailed instructions on adding CSS to a theme, see Add CSS to the subscription widget.
div#rc_login {
	font-size: 14px;
	margin-bottom: 0;
}

div#rc_login h5 {
	margin-bottom: 0;
}

div#rc_login a {
	color: #00BADB;
}
Multi-location injection
Building on the use case above, you can inject the account access in multiple places within a theme.
- Add the other desired anchor elements for the account access link in the
settingsarray as additional objects.
window.rcLoginAccessLink = {
    settings: [
        {
            page: '/',
            injectionAnchorSelectors: ["#header_customer_login"],
            injectionPosition: 'afterend'
        },
        {
            page: '/',
            injectionAnchorSelectors: ["#customer_login"],
            injectionPosition: 'afterend'
        }
    ]
};
- You may need to adjust the DOM position of the elements if they render as shown below.

- Once you've adjusted the
injectionPostionproperty and added CSS, the link should appear as shown in multiple places.

Updated 2 months ago